Tuesday, 12 August 2014

Hints and Tips #02 - Pristine vs. 'Used'

The model-builder has two choices when completing a kit. The first option is the 'pristine' route; a clean and tidy model that looks like it has just rolled off the production line. For display on the desk, in the display case or on the shelf - this is ideal. The model can also be made quickly and easily - just by following the kit instructions and using the colour schemes/decals as supplied. An example of this is below.


This new-tool Airfix Typhoon was built up in the space of 4 days from a starter set. All colours as per the instructions; it looks like it has been cleaned and polished to within an inch of it's life. Most preserved examples of airframes as displayed in museums would be pristine or near-pristine finish - so as a pure display item this is fine. However any internal-combustion powered machine creates dirt as it runs and is used, it also picks up grime and contaminants from the environment. Hence, any model depicting a machine which is in use or operational service will need a few tweaks to reflect this.

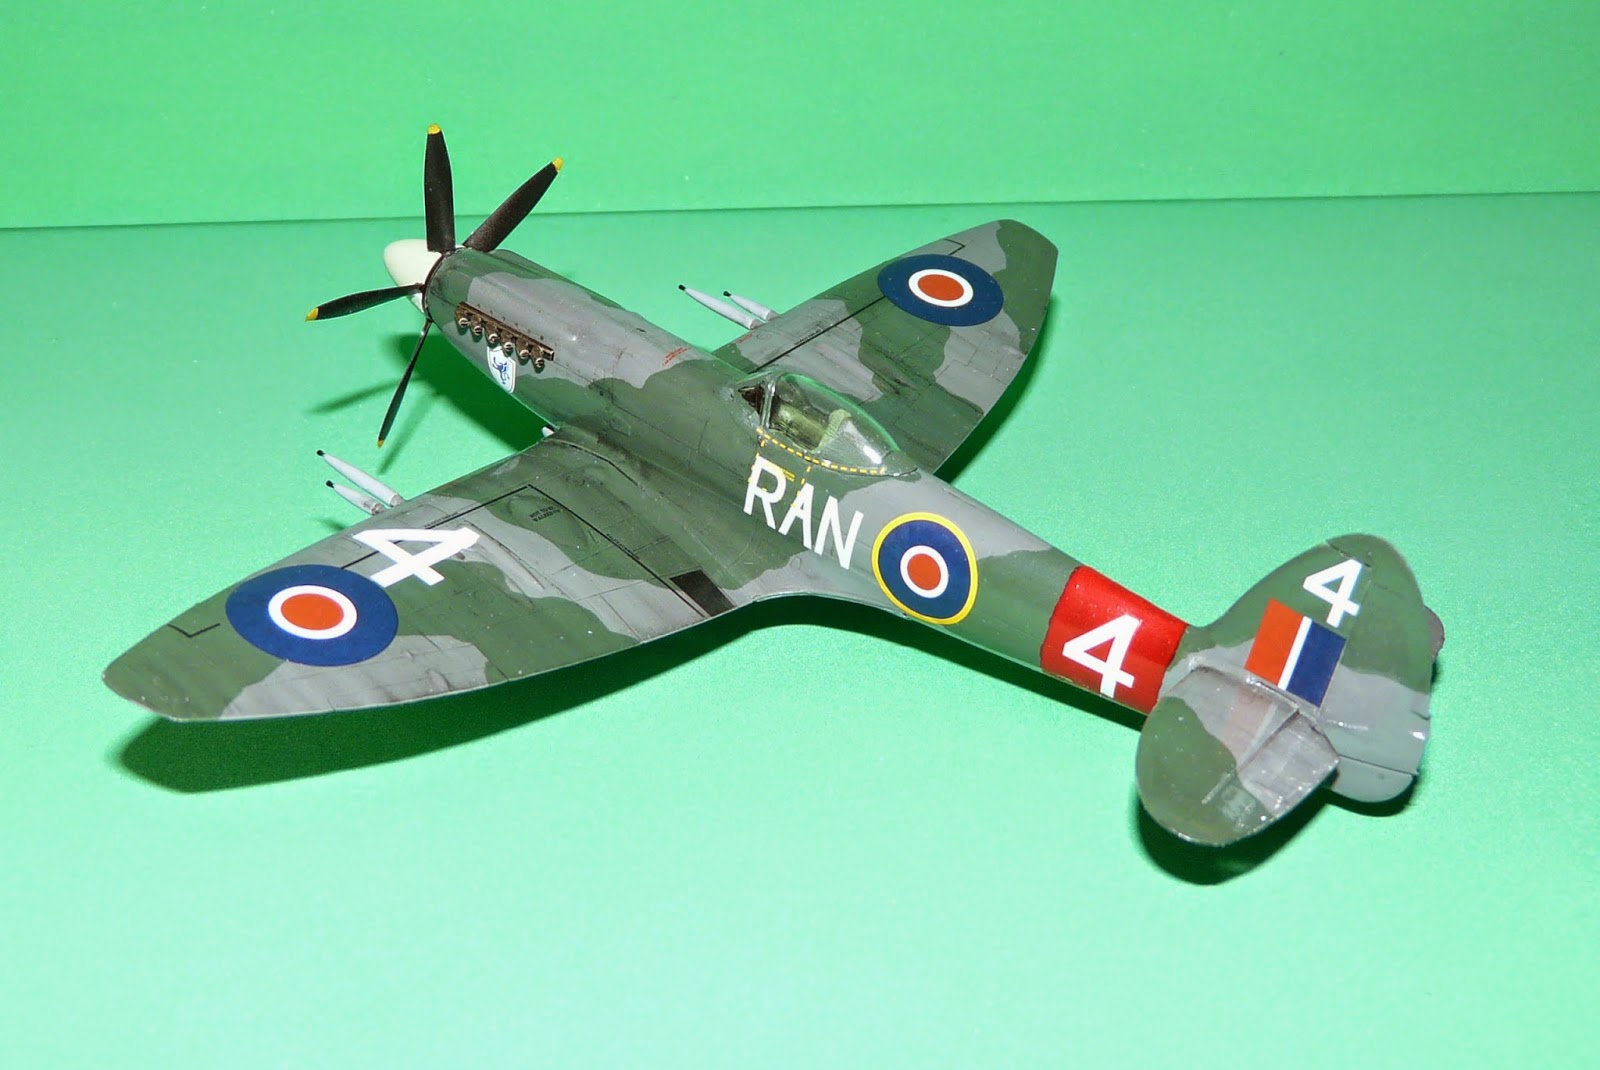
This Spitfire Mk22 is in a similar colour scheme - however it looks altogether more 'used'. I've never seen a Spitfire this worn today - all the examples are very well cared for and looked after by either their owners or museums (good job too!). However this example depicts one used in the Cooper Air Race - the dirt is perhaps exaggerated in this example - but the texture of the airframe is less 'flat' and plastic-like. Exhaust staining is common on any aircraft - even modern turboprops - so this is applied just under and behind the exhaust exits on the nose. The prop blades are also given a very light grey dry-brush on the leading edges.

The trade-off is that this model (being roughly similar to the Typhoon in complexity and part-count) took about twice as long to complete. The paint scheme was first protected by satin varnish - then out came the washes (in this case a very heavily thinned humbrol black) to get into all of the panel lines and recesses. The excess was then streaked off of the wings and fuselage with a cotton bud soaked in thinners. The streaky oily finish looks the part - and it is easy to get decent results quickly. By protecting the paint coat underneath with satin varnish - you also avoid damaging the colours if you go too mad with the weathering!

Both pristine and weathered modes have their merits. For models depicting a static display airframe or one in 'as-preserved' condition - pristine is good. For models which are 'in-use' - some weathering will be needed to protray this. Both of the above examples looked good sat next to eachother on the bench - and both were  subsequently snapped up by bidders - so someone must have liked them!

Vampires and Sea Kings

Here are the latest models on the workbench. First is a De Havilland T.11 Vampire as built up from Airfix's excellent recent tooling. Certainly looks good in Silver and Orange!


This model has since sold - but other Vampires are in the works!

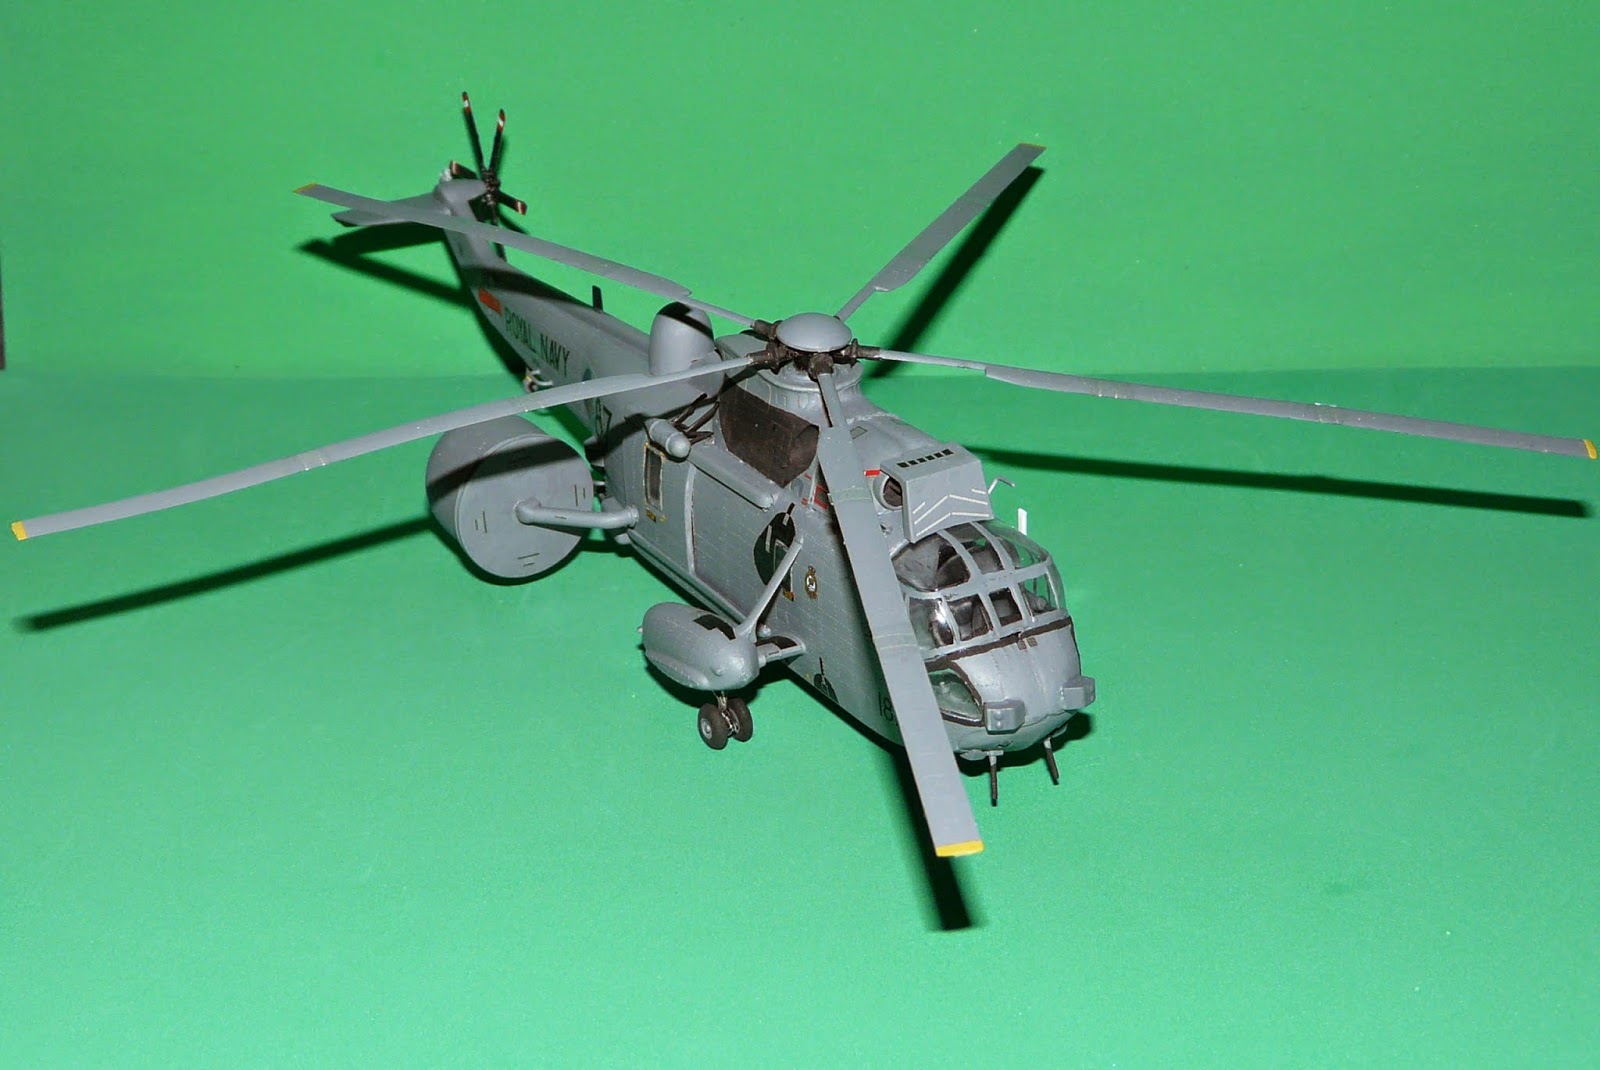
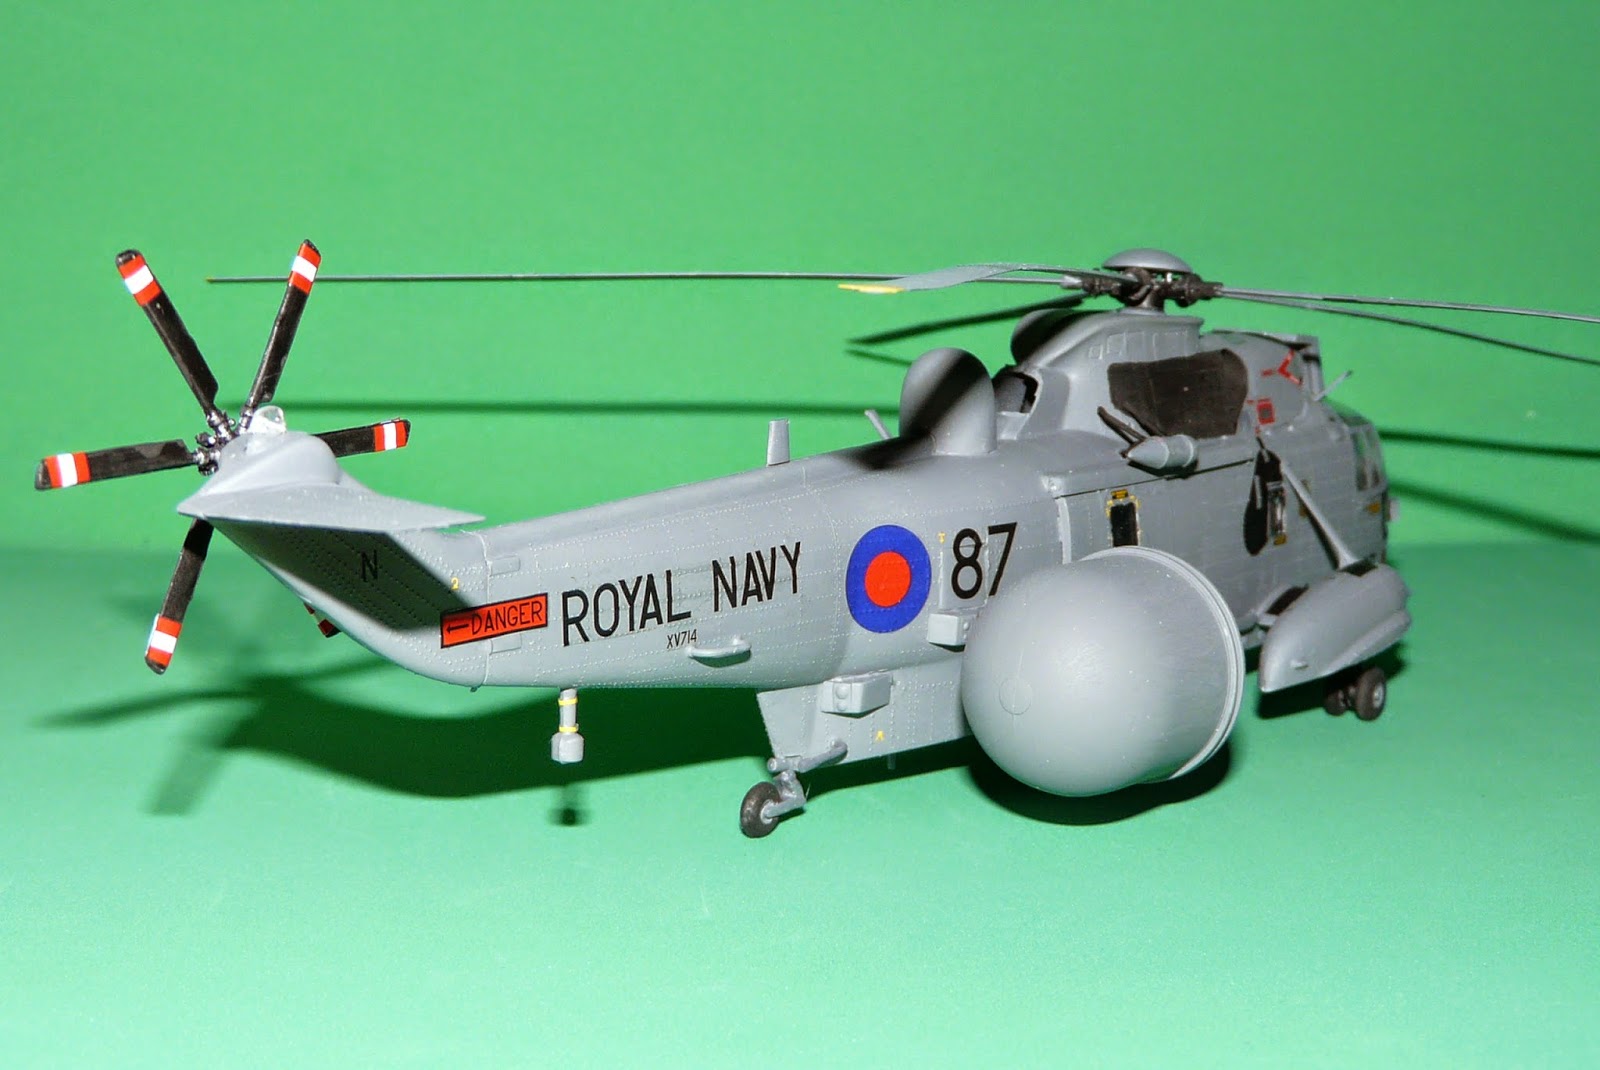
Next on the production line is Sea King AEW. This takes Airfix's older tooling and updates it with the various components as fitted to the Airbourne Early Warning variant of the Sea King. The addition was in fitting the large Radome for the AEW Radar - this being set in the retracted position to enable the model to sit on it's landing gear. Not the prettiest Westland helicopter, but an interesting model nonetheless.


Keep an eye out for this one - a few tweaks to the rotor head and it will be up for auction!

Saturday, 7 June 2014

On the workbench....

After a brief break from putting model planes together - I decided to finish off a number of projects which have been on the workbench for some time. Some of these will be going to auction on Ebay at some point in the not-too-distant future; so keep an eye out for them!

1/72 De Havilland Tiger Moth (Airfix New-Tool)


Airfix has released a number of new-tool revisions of some of their classic kits over the past few years - this Tiger Moth being one of the most recent. The old kit wasn't bad by any means - but this new kit is a significant improvement in terms of overall detail. The struts connecting the wings, fuselage and tail seem quite a bit finer than the previous kit - this having the side-effect of making removing them from the sprues a very delicate process! 

1/72 Messerschmitt Bf 109 G (Italeri)


Currently drying after it's final paint coat and awaiting the fitting of aerials on the fuselage - this Italeri Bf 109 G has come together quite well with very little fuss. The intention at this point is to finish it in as a post-war Finnish Air Force machine.

1/72 Shorts Tucano (Airfix)


The second Tucano I've built - more or less the same colour scheme as the first time out! The advantage of doing a virtually identical kit more than once is that one is better equipped for the pitfalls the second time around! In this case, the question of how to fit enough nose-weights to stop the thing from falling over can be solved by the cunning use of some welding wire.


1/72 Consolidated Catalina (Airfix)


As promised in the last post - the Catalina now finished! A model which was by no means an easy build due to some fit issues - however the end result with transfers and detailing applied makes for an impressive spectacle when parked on the display shelf. (Note - this model's wingspan is short in this photo for a reason - the outer wings are removeable for the sake of easy storage). A selection of transfers were sourced from the spares box to represent a Coastal Command machine.

Issues with weight distribution in models seems to have been a running theme this week - the 'Cat' has a great deal of mass up high on the wing and so would need a lot of lead in the nose if balancing this using weights alone. The welding-wire solution came to the rescue once again!


Monday, 12 May 2014

Catalina Build

As far as aircraft go; the Consolidated Catalina is one of the best looking (in my somewhat biased opinion). Airfix's kit of the 'Cat' has been around for a while but still builds up into a good depiction of this seaplane. The 'classic' Catalina livery seems to be an overall white scheme with black leading edges when in RAF / Coastal Command guise. This was the route I decided upon - since it is the image of the Catalina that most people are familiar with.


Above is the kit after a day's session of airbrushing with Matt White / Black. The internal spaces were quickly coated with Humbrol 78 'Cockpit Green' using the brush before the two fuselage sections were attached. By the end of two afternoons - the kit is in it's main sub-assemblies of main hull, central / outer wings plus landing gear units.


The engine detail was picked out by dry-brushing - the bronze/gold rings being painted on freehand. Any kind of moulded or raised detail is instantly brought to life by giving it some contrast. 


The model was put together without glue - the various assemblies rather thoughtfully staying put for the photo. Test-fitting a big kit like this is always handy to check for any major alignment issues - prior to finding out the hard way! The canopy and observation blisters were carefully hand-painted and also test fitted at this point. Even without transfers - this model is now starting to look like the box-art!

Another post showing the finished result with transfers applied is on the to-do list!


Sunday, 20 April 2014

Trafalgar Class Completed

Just a follow-on post showing some photos of the completed model. 


A relatively trouble-free build and a joy to put together - will definitely have to do another one of these in the near future!

Saturday, 19 April 2014

Trafalgar Class Build

As someone who mainly deals with aircraft - I sometimes feel it's a good thing to take the occasional foray into other model types. Having been a while since undertaking a ship model - I had a look at the 'stash' (that pile of un-built model kits on the shelf which seems to grow steadily bigger no matter many you build!). I had two options - a 1/350 Airfix Trafalgar Submarine or the rather large 1/400 Revell model of the Titanic.

Given that the workbench was cluttered enough as it was (and the difficulties with the domestic authorities in this regard) - I decided to leave the ocean liner and go for the sub.


Currently the only submarine model in Airfix's lineup as of 2014 - this model builds up into a good depiction of the prototype. Online reference photographs were somewhat thin on the ground - only showing the class when in the water and thus hiding anything below the waterline. However, since most of the still highly-classified bits and bobs tend to be under the waterline (hydrophones, active sonar arrays, etc.) - it is perhaps understandable that the RN don't want too much detail pasted on Google Images!

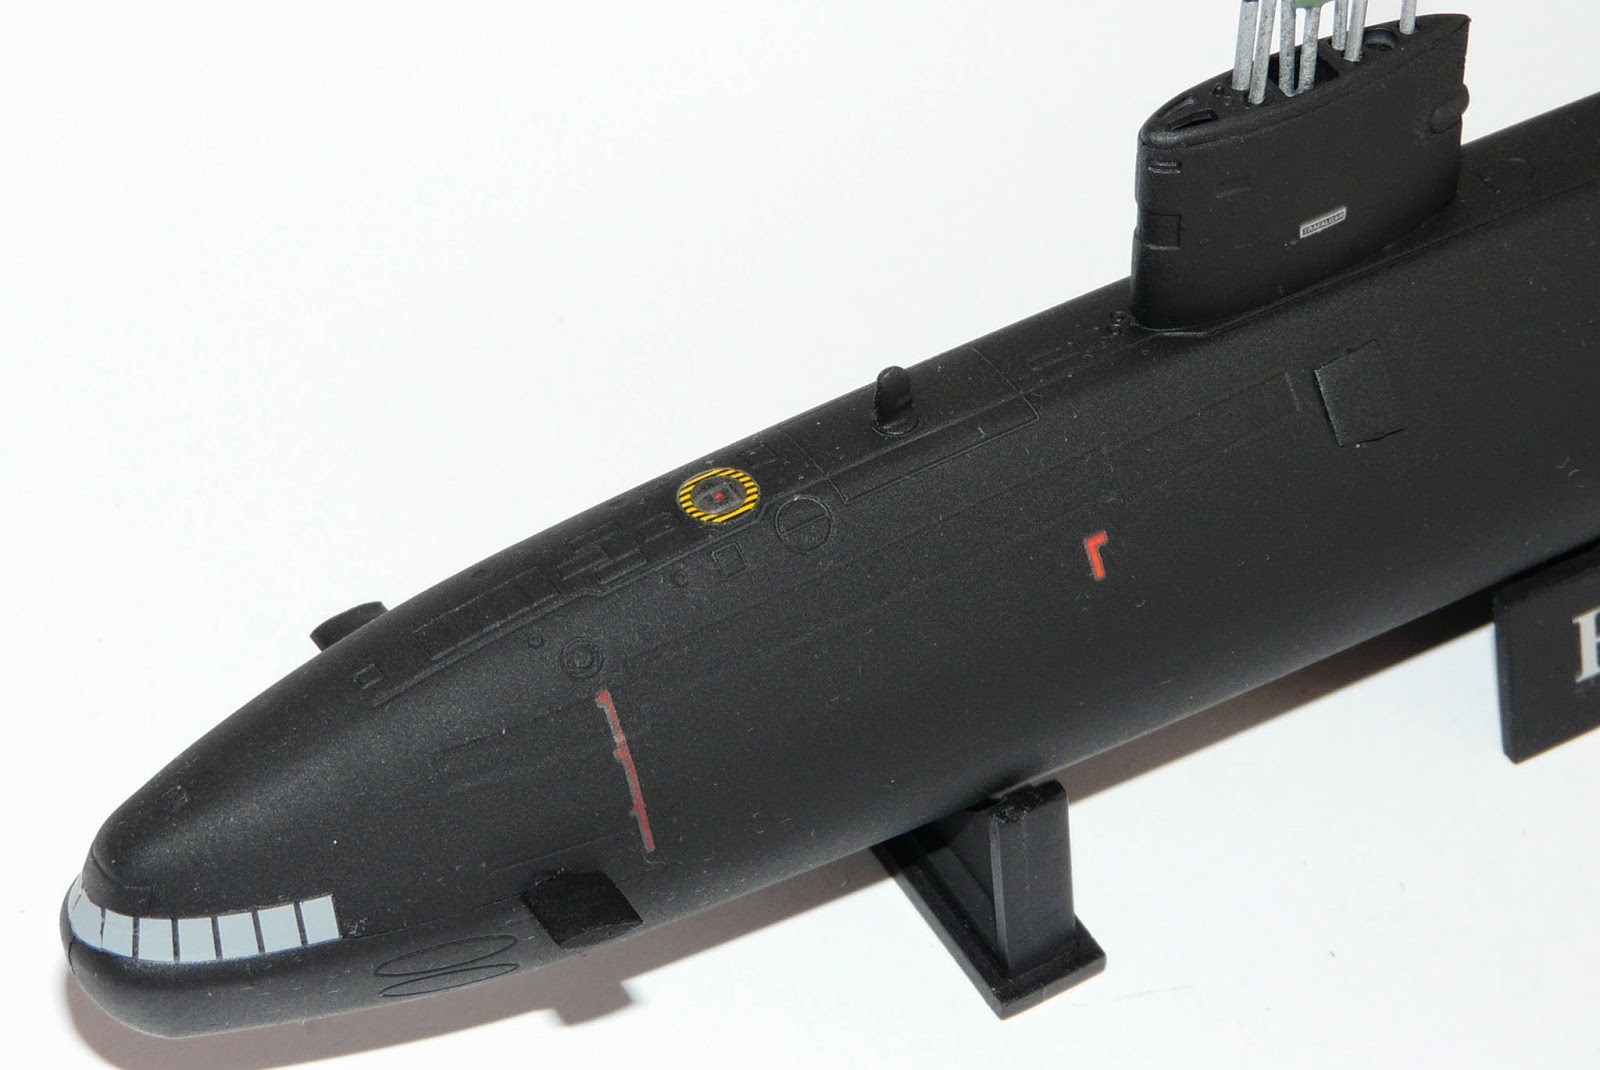
The model was relatively easy to assemble - much more so than I was expecting. The hull itself is made up of three parts which bond together to make the familiar teardrop profile of most modern subs. The kit allows the sub to be modelled with antennas and periscopes extended/retracted; as well as the hydroplanes stowed or deployed. I decided to have all of the masts and planes deployed. Crucially, since this would be finished as a 'display' item - the finish would be pristine (no weathering).


Here is the model just after spraying with the trusty airbrush. Humbrol Matte Black was used - lots of thin coats being progressively added to build up the opacity of the paintwork while preserving the fine recessed detail on the top 'deck' of the sub. The viewing stand was airbrushed in the same colour to match. At this point you could be forgiven for leaving it 'as-is' - since this how most Trafalgars appear to the casual viewer when in the water.


Now with transfers applied and masts fitted - the finished article! Now on to the MiG-29UB (which can be seen lurking in the background waiting for some decals).


Monday, 7 April 2014

Hints & Tips #01 - Using Spare Transfers

A common practice among many hobbyists is to keep what they don't use - be it spare plastic parts on the sprues or transfers.

When building a kit and using the transfers or decals which come with it - you will invariably be left with some left over. This is especially the case when the kit comes with several 'options' - perhaps to depict models from different time periods or nationalities. Keep what you don't use and over time you will build up a 'spares' box of decals.

They can be handy for replacing damaged decals on existing models; or for adding more markings to kits where you don't have too many kit-supplied transfers.

They can also come in handy if you wish to do a common kit in a different scheme - like the model below.


This 1/48 Spitfire Mk Vb was originally an Airfix Tropical Spitfire Vb. First the airframe was painted in the appropriate colours plus some 1/48 Soviet Russian markings which had been left over from a Gavia La-9 were applied. The end result is a convincing (and unique) Lend-Lease Spitfire Vb. 


Sunday, 6 April 2014

Creating a Blog!

So having worked as a model-maker in a professional capacity for the past 3 years - I decided that my 'online presence' was somewhat lacking. For prospective customers or those interested in what I do - the only avenue was to look at the items which I sold on Ebay every week or so. For people enquiring about my work - I needed an online resource for people to have a look at.

Hence this blog.

So what do I do? 

Put simply; I build model kits - assembling, painting and finishing them to a standard suitable for display. I then sell these 'built-up' model kits (primarily via the aforementioned auction site) on to a variety of customers. It always raises eyebrows when people ask what I do for a living - but it seems to have worked well enough for the past three years.

It isn't so much a full-time job as a 'self-sustaining hobby which pays the bills'.

What kind of models?

Mainly aircraft in 1/72 and 1/48 scale - these scales being well catered for by most kit manufacturers. The likes of Airfix, Academy, Hasegawa, Hobbyboss, Italeri, Revell, Tamiya and Trumpeter (probably missed some out) all do a great selection of kits to a variety of specifications - meaning that there is something for everybody.


I also occasionally make motorcycles (the Mike Hailwood Replica above now resides in a bike showroom somewhere in the Midlands) and cars. I did make a foray into 1/35 AFVs - however the fact that tanks are not planes significantly dampened my enthusiasm. The odd ship or boat is also not unknown!

Who is interested in models which are already built?

People who collect such models, to businesses and individuals who want them for display purposes. One particular 1/72 Spitfire Mk V was purchased by a proud father to hang from his son's bedroom ceiling! Others have been used as part of community displays.

Many people also would like a particular model but don't have the money to commission one from a master scratch-builder or the time to build their own. In such cases; buying a model built-up from a readily available kit is an affordable alternative.

A wide range of customers after a wide range of models.

What is the point of this blog?

Hopefully, this blog will raise the profile of what I do - much more so than people just having a look at my Ebay profile. Secondly; it will also be a blog of general kit-building - e.g. odd reviews, aviation modelling and the occasional tutorial. Either way - something to interest most people.

I sincerely hope visitors to this blog will enjoy what they read.


Contact Form

Name

Email *

Message *