
This new-tool Airfix Typhoon was built up in the space of 4 days from a starter set. All colours as per the instructions; it looks like it has been cleaned and polished to within an inch of it's life. Most preserved examples of airframes as displayed in museums would be pristine or near-pristine finish - so as a pure display item this is fine. However any internal-combustion powered machine creates dirt as it runs and is used, it also picks up grime and contaminants from the environment. Hence, any model depicting a machine which is in use or operational service will need a few tweaks to reflect this.
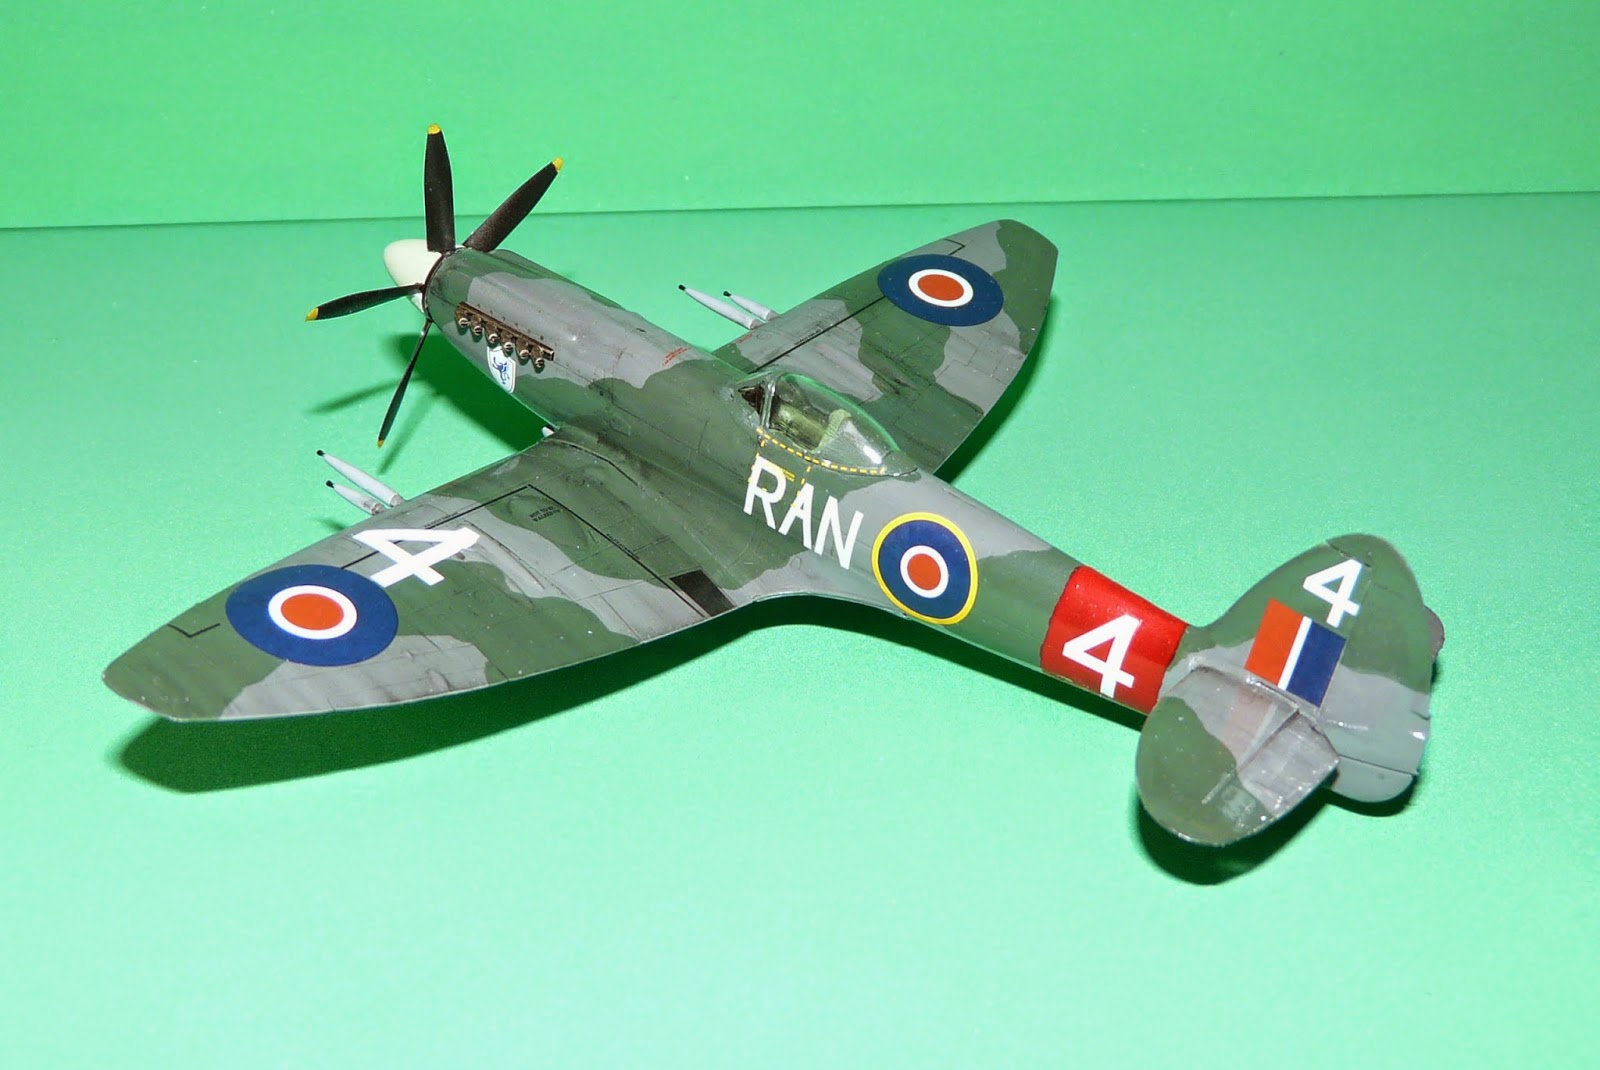
This Spitfire Mk22 is in a similar colour scheme - however it looks altogether more 'used'. I've never seen a Spitfire this worn today - all the examples are very well cared for and looked after by either their owners or museums (good job too!). However this example depicts one used in the Cooper Air Race - the dirt is perhaps exaggerated in this example - but the texture of the airframe is less 'flat' and plastic-like. Exhaust staining is common on any aircraft - even modern turboprops - so this is applied just under and behind the exhaust exits on the nose. The prop blades are also given a very light grey dry-brush on the leading edges.
The trade-off is that this model (being roughly similar to the Typhoon in complexity and part-count) took about twice as long to complete. The paint scheme was first protected by satin varnish - then out came the washes (in this case a very heavily thinned humbrol black) to get into all of the panel lines and recesses. The excess was then streaked off of the wings and fuselage with a cotton bud soaked in thinners. The streaky oily finish looks the part - and it is easy to get decent results quickly. By protecting the paint coat underneath with satin varnish - you also avoid damaging the colours if you go too mad with the weathering!
Both pristine and weathered modes have their merits. For models depicting a static display airframe or one in 'as-preserved' condition - pristine is good. For models which are 'in-use' - some weathering will be needed to protray this. Both of the above examples looked good sat next to eachother on the bench - and both were subsequently snapped up by bidders - so someone must have liked them!
No comments:
Post a Comment
Note: only a member of this blog may post a comment.